Location: Littleton, CO
Symptom: Path of Adventure not working
One of the features of the pinball machine, Indiana Jones and the Pinball Adventure, is the Path of Adventure. From a servicing perspective, it could be renamed the Pain of Adventure. The Path of Adventure is also referred to as the mini-playfield in the diagnostics and error messages. It is located in the upper left of the main playfield.
Upon entering the mini-playfield test from the TEST menu (T.15), the software will run a quick left-right test of playfield. If the test is good, but you still have a problem with the playfield moving during game play, the problem is in the flipper circuit which is outside the scope of this article. If the test is good, the playfield will be level. Usually if the test is bad, the playfield will be tilted one way or the other. If the test shows the mini-playfield as bad, then read on.
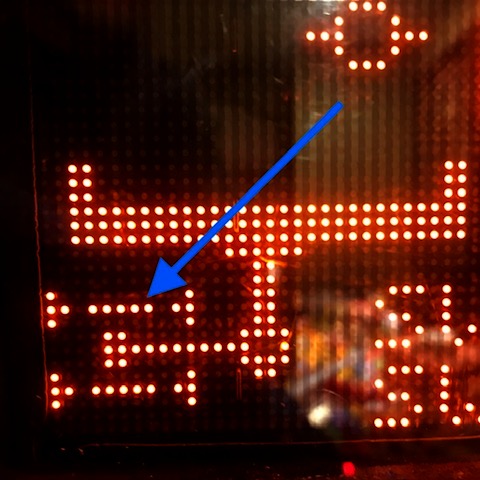
Pressing the red + or – buttons should move the playfield left or right. If one of the left-right opto sensors has failed, the playfield will cease to move, making you suspect it’s a problem with the motor or the drive circuitry. The way the software is written, it will not move left or right if the sensor already says it’s there. When an opto sensor fails it is interpreted as the light beam being blocked which is the same as the mini playfield being in the left or right position. If the motor appears to be stuck in the left or right position, the problem is usually with an opto sensor and not the motor.
For example if the left sensor is bad, and the playfield is in the right position, it will not move in either direction because both sensors are interpreted as blocked and the software won’t move the motor. The display can’t show it being in both left and right positions at the same time. But it will show the light beam missing from the opposite sensor. You will not be able to manually move the motor in any of the test menus.
In all of mini-playfields I’ve worked on, the lower or “left” sensor is the one that has failed. It may be just a coincidence.
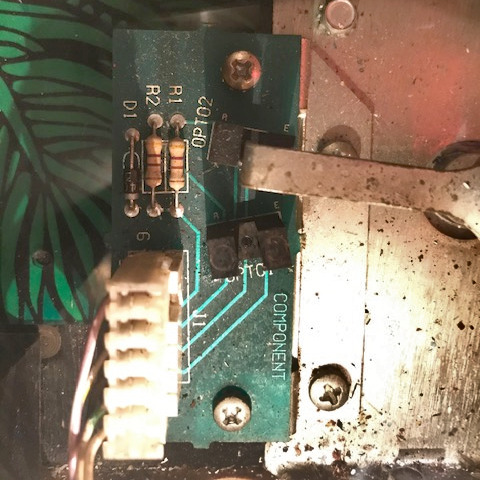
If the following is done carefully, you can diagnose the issues with the motor without removing the mini-playfield. Open the backbox and locate Q30 and Q34 transistors on the large IO board. They will be transistors with metal tabs, just left of center. Connect one end of a jumper wire to ground (the easiest is the braided ground strap in the bottom corner of the backbox).
Enter the test menu for the mini-playfield. Quickly momentarily touch the other end of the jumper wire to either Q30’s or Q34’s metal tab. The mini-playfield motor will move. Grounding one transistor will move the motor one way, and the other transistor will move it the other way. If the motor runs correctly in both directions, the motor and the drive circuitry are likely good. Do not leave the jumper wire connected to either transistor so that it forces the playfield to extreme left or right positions and stalls the motor.
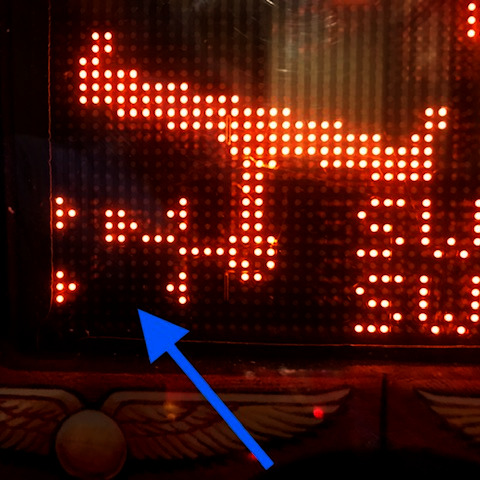
Using the jumper wire and alternately touching the transistor tabs, try to position the playfield so it is level, neither left or right. Verify that neither opto sensor is blocked by looking at the opto sensor board at the top of the playfield (if the mini-playfield is still installed, you have to look down in the crack above the top of the mini-playfield) and make sure the opto interrupting arm is between the sensors. Now look at the display of the mini-playfield test. If it still shows the playfield tilted left or right, then that opto sensor is bad.
Often it’s a cracked solder joint or a broken lead on the opto sensor. It might be easier to replace the opto board. At the time of writing this, there are some aftermarket boards available. Search for the part number of the board, A-16657.
Removing the playfield generally isn’t too difficult as long as the head of the allen set screw which holds the playfield on to the motor shaft isn’t stripped. I usually replace it with a 8-32 phillips head screw. There are instructions for removing the mini-playfield in the manual on page 1-47.
With the machines I’ve worked on, the mini-playfield seems to move more to the right than the left. And, when in the center it seems to be tipped slightly to the right.