Superman Pinball Machine (Atari, 1979)

Location: Westminster, CO
Symptoms: Wouldn’t boot, flipper not working, drop target reset short, + more

Atari made a hand full of pinball machines before they closed that division to focus solely on video games. Superman is one of two games made with the 2nd generation pinball system.

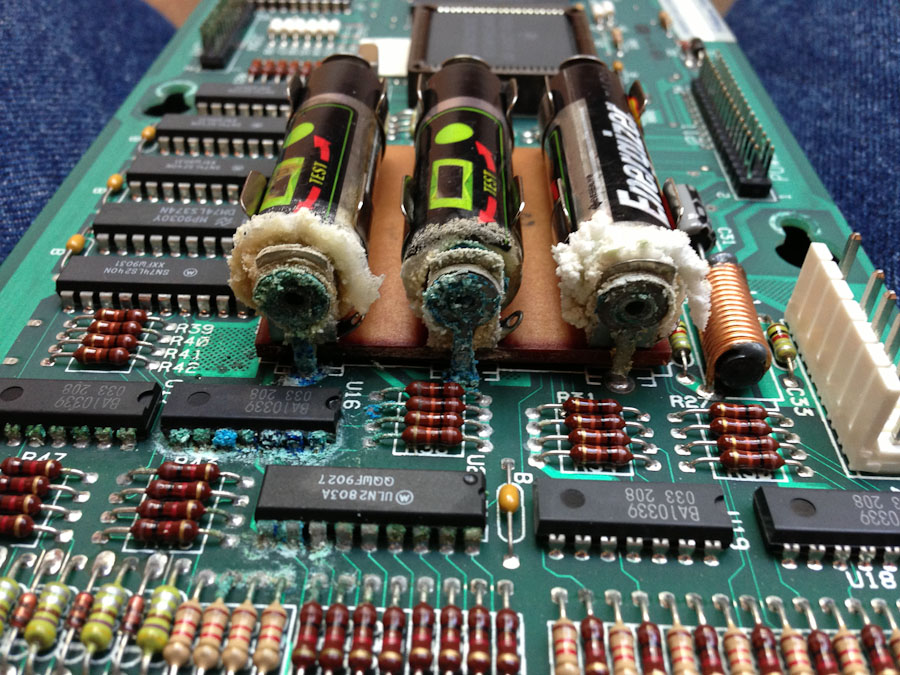
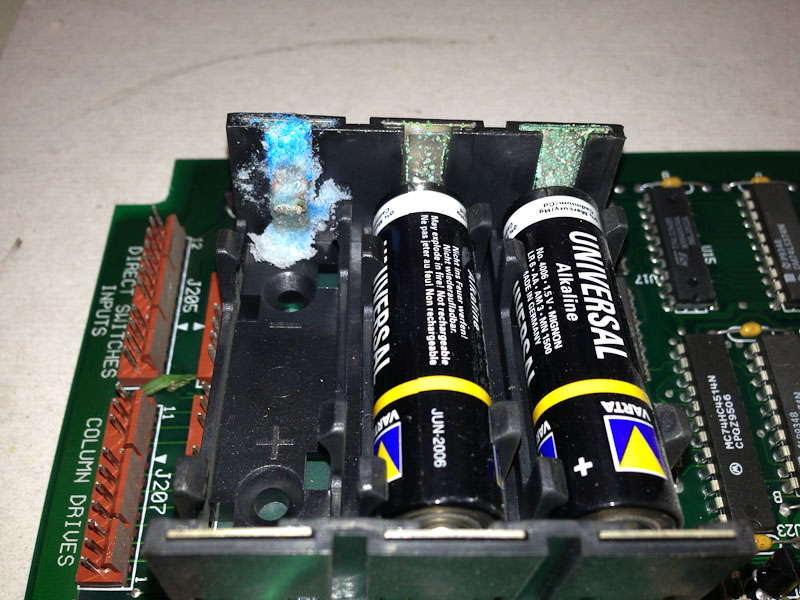
This machine had not worked for a long while while it sat in a basement.  The RAM batteries had leaked. The owner thought they probably hadn’t been replaced since the 1980’s. So the first task was to get that cleaned up and locate a remote battery pack off of the board.  (Unfortunately, the AnyPin NVRAM module will not work with Atari machines.)

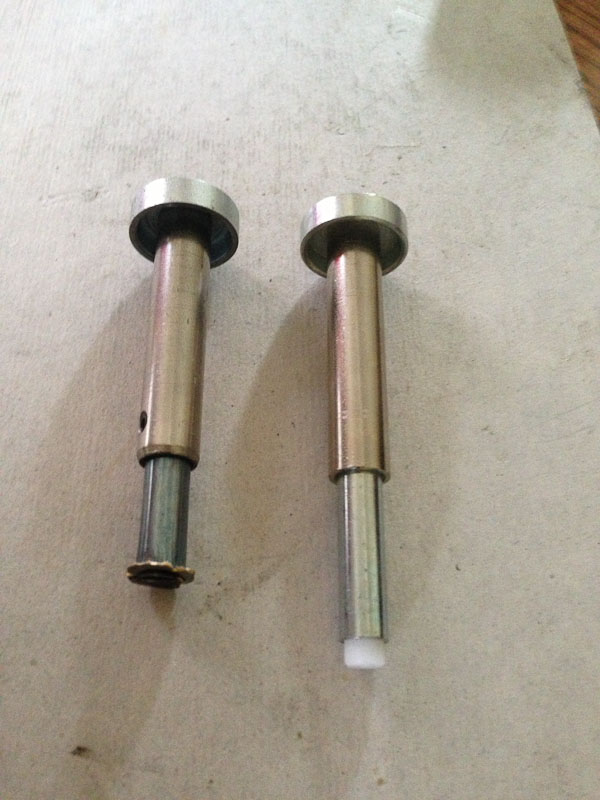
Once I got it to boot, I discovered the left flipper didn’t work.  The flipper coil was badly damaged by something hitting it. A new coil was ordered.

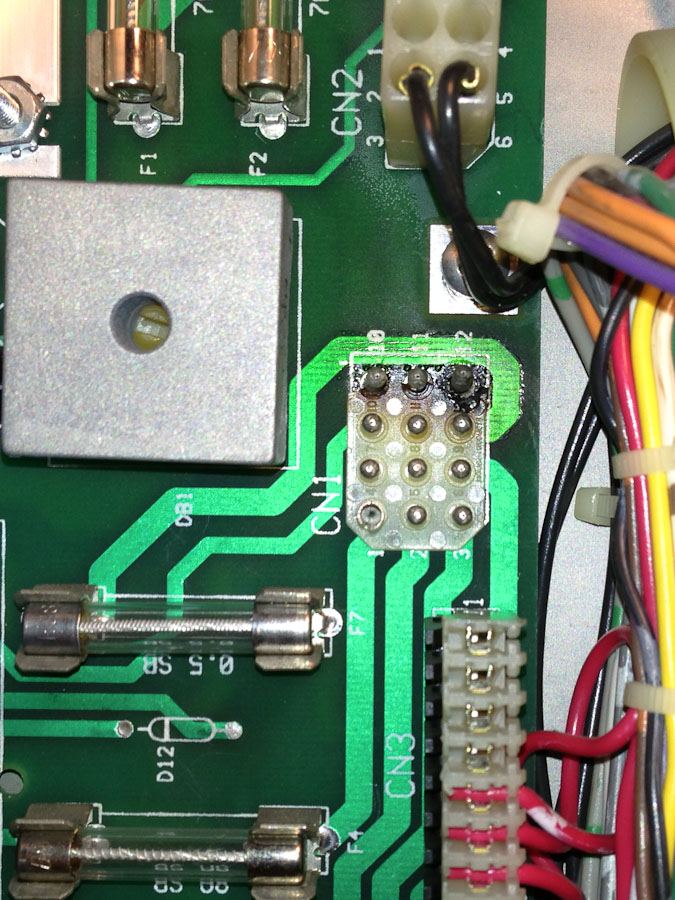
The Atari system has a coil protection circuit that is supposed to shut down the coil power if it detects a shorted coil, in order to protect the drive transistors.  In this case there was a shorted transistor driving the drop target reset coil.  So basically every time another playfield coil was activated, the center drop targets would reset. I replaced the transistor it the coils started acting normally.  It was a bit confusing at first because unlike other pinball machines which use NPN transistors to drive the solenoids, these drive transistors are PNP.

Needless to say, with the lack of service on this machine, all of the rubber pieces were dry, cracking and brittle.  So I replaced all of the rubbers, about 20 burned out lamps, and cleaned the playfield.  The ball was also rusting, so I replaced that, too.

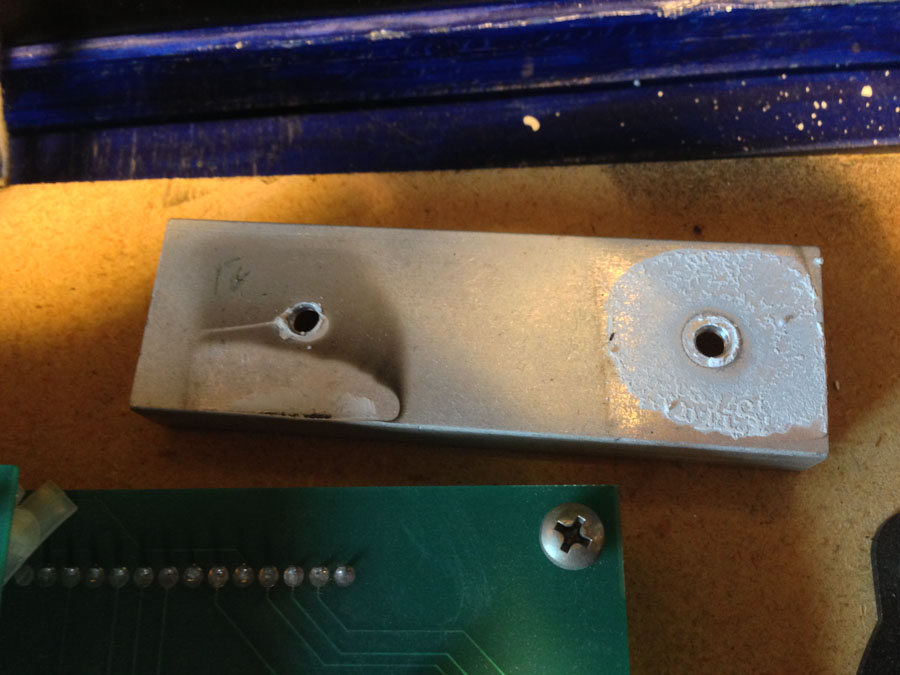
The target switches are hexagonal white, which nobody sells anymore. One of them is broken (and remains that way for now).  Perhaps I’ll run across one at some point, or maybe I’ll take a rectangular target and cut the corners off.

Aside from the target switch, it’s working great.  It’s the first time I played Superman and it seems like a fun game.

The owner let me borrow the complete set of schematics of this machine for scanning and will be available on the Internet Pinball Database (has not been approved as of this date).

Wurlitzer 850 Jukebox (1942)

Location: Bailey, CO
Symptoms: Needed adjusting and tuning, front door grill repair, broken bubble tube

This jukebox is a beauty, with a wonderful patina that I don’t see very often because it still had its original plastics and the original chrome has worn off most of the metal.  Most jukeboxes of this vintage have had their plastics replaced and their metal re-chromed.  My initial instinct was to replace the plastics and make it look like new.  But the old plastics with their muted transparency really grew on me.  Besides, it doesn’t look like anyone is still making reproduction plastics for this model.

Wurlitzer 850 Jukebox

Wurlitzer 850 Jukebox at night (Click for larger)

And because the German Wurlitzer company recently made reproductions, the patina sets this one apart.

Daytime view

Daytime view

On to the repairs…

There were a lot of small problems with the mechanism because it was gummed up.  It looked like the mech was cleaned sometime in the 1990’s so there wasn’t a ton of old grease.  It just needed some fresh lube.  It also needed some adjustments as the turntable wasn’t lifting high enough and it wasn’t tripping correctly at the end of the records.

The amp didn’t  sound good, but it turned out the needle wasn’t seated into the cartridge correctly.

Some of the wiring in the switch junction box wasn’t looking safe, so I rewired it.  Some of it previously had been bypassed.

The left bubble tube was broken due to a blow to the lower grill castings of the jukebox, probably during moving. Unfortunately it broke the threaded anchor points for the screws in the castings. I removed the grill castings and used some metal epoxy to attach some new standoffs and reinforce one that was remaining.

Front grill casting with new threaded standoff attached.

Rear of front grill casting with new threaded standoff attached.

The speaker bushings were replaced with new ones, as the old rubber bushings were brittle and broken.

Everything was looking, sounding and working pretty well when it was done.  The repairs were performed over the course of a couple of months.


Whirlwind Pinball Machine (Williams, 1990)

Location: Highlands Ranch, CO.
Symptoms: Ramps tries to lower even though it’s already down; delivers two balls into shooter lane.

After checking the mechanical operation of the ramp and running switch tests, I concluded (or guessed) that the microswitches on the ramp and ball trough were acting intermittently.

Sometimes when a machine acts weird like this, you have to think about what the firmware is attempting to do.  In the case of the ramp, it tries to lower the ramp because it hasn’t sensed that it has been lowered.  So it would keep trying 4 or 5 times before giving up.

The reason the computer was delivering two balls to the shooter lane is that it wasn’t sensing the first ball had actually made it to the shooter lane, so it would try again.

Both of these problems weren’t consistent which led me to the intermittent switch idea. The microswitches were probably dirty and worn inside.  Unfortunately, since they are totally enclosed they can’t be easily cleaned.  Sometimes I can flush the switches out with contact cleaner, and get them working again.  In this case, it worked!

Gold Ball Pinball Machine (Bally, 1983)

Location: Highlands Ranch, CO.
Symptoms: Wouldn’t boot, rubber rings crumbling.

This machine sat neglected prior to the current owner purchasing it.  Although the NiCad battery looked ok and looked like it had been replaced relatively recently, there was a lot of corrosion on the CPU board.  It was even affecting the RAM sockets, where I could see blue-green corrosion in the socket holes.  During the boot process, the LED would only flash a couple of times, indicating a RAM failure.

Normally I would try to fix something like this.  In this case, since there was an aftermarket CPU board available, I recommended the owner purchase the new board.  With the old board, I could fix one thing, only to learn something else was damaged by the corrosion.  It turned out I was correct, except the corrosion had spread to the sound board, which sits right below the battery.  It had damaged the sockets there as well.

I was able to get the sound board working with some cleaning.

The rubber rings and burned out bulbs were replaced, and the playfield cleaned as well.

Tee’d Off Pinball Machine (Gottlieb, 1993)

Location: Cheyenne, WY
Symptoms: Flipper problem, Spinner problem

It seems like every Gottlieb – Premier pinball machine I work on has over-fused flippers.  The fuse should be 2.5 amps and in this machine there were 5 amp fuses installed.  When the flipper link broke, it caused the flipper arm to not engage the End-Of-Stroke switch, which caused the coil to melt.  Had the correct fuse been installed, the coil would have been saved.

I replaced the coil, the fuse and the broken link and everything is fine with the flipper.

The other problem, and I’ve seen this on a Monte Carlo pinball machine (which is the same vintage) is that the switches on the center spinner don’t work.  In this case, the spinner wasn’t spinning very fast either.  I cleaned and oiled the wiper contacts and the gears.  I checked every hole in the spinner and verified that each switch was working.

Funhouse Pinball Machine (Williams, 1990)

Location: Up Poudre Canyon, west of Fort Collins, Colorado.
Symptoms: Needed to be “shopped” (basic restoration).

This pinball machines gets the award for the worst leaking batteries I’ve ever encountered.

Forgotten batteries causing a lot of damage.

Forgotten batteries causing a lot of damage.  Click for larger.

The corrosion was so bad that the battery holder nearly fell off the board when I started cleaning it up.  The corrosion had eaten through the metal pins that hold the battery holder to the board.  As you can see from the photo above, the corrosion was also affecting the nearby circuitry.

I finished removing the battery holder from the board and flushed the board with white vinegar and scrubbed with a toothbrush.  The vinegar helps to neutralize the alkaline. After letting the board dry out for several hours, it still was able to boot up.  I installed a remotely mounted battery holder on the inside of the backbox, where if the batteries leak in the future, it won’t damage anything.

I “shopped” the rest of the machine, replacing rubbers, cleaning the playfield, and replaced the bad bulbs.  The machine is working great and looking great.  I’ve now worked on more Funhouse pinball machines than any other model, breaking the previous record held by Star Trek: The Next Generation.


No Fear: Dangerous Sports Pinball Machine (Williams, 1995)

Location: Castle Rock, CO.
Symptoms: Needed to be “shopped” (basic restoration).

The biggest problem that this machine had, which I’ve come across a lot lately, is forgotten batteries.

Batteries dated 2006 badly leaking and damaging the battery holder and switch connector (not shown).

Batteries dated 2006 badly leaking and damaging the battery holder and switch connector (not shown).

Fortunately, on the WPC-95 systems, the batteries are mounted on a separate piggy-backed board which saved the CPU board from certain death.  But even so, the alkaline affected the cabinet switch connector located right next to the batteries.

The battery holder was removed and the RAM chip at U8 replaced with an anyPin NVRAM module that doesn’t require batteries.

The playfield was cleaned, all of the rubber parts were replaced, as well as the slingshot plastics.  The machine is looking good and playing well.

Terminator 2: Judgement Day Pinball Machine (Williams, 1991)

Location: Castle Rock, Colorado.
Symptoms: Machine needed to be “shopped” (basic restoration).

The owner had just purchased the pinball machine from an acquaintance. The playfield was one of the dirtiest I have ever come across.  Fortunately, with a lot of elbow grease, Novus 2 polish and some Mill Wax, I was able to get the playfield looking pretty good.

To clean the playfield and replace all of the rubber parts, the ramps had to be removed, then replaced.  This is time consuming, but was worth doing.

I installed a new flying hunter killer ship kit for the playfield, since it was missing.

The pinballs were replaced with new ones because the existing ones were badly pitted.  The main reason the balls were badly pitted was that the left side kickback was badly damaged. Each time it would fire, it would slam, metal to metal, against the ball, making small pits in it.  The metal that was on the ball would come off and wear into the playfield.

Damaged kicker on left, new kicker on right.

Damaged kicker on left, new kicker on right.

By the looks of it, this kicker had been broken for years. Never allow any device that comes in contact with the ball to go un-repaired.  The playfield is the most valuable asset in a pinball machine and pitted balls will shorten its life.

The switch on the cannon was intermittently bad.  Usually it’s the wires that have broken after the cannon has twisted them back and forth thousands of times.  But in this case, it was the switch itself.  It was replaced.

It goes without saying that any burned out bulbs were replaced.

By the end, the pinball was playing well and looked great.  Some of the mylar on the playfield is bubbling and that will have to be addressed at some point in the future. The biggest problem with removing it will be that the decals on the playfield inserts will not survive the process and I haven’t seen any decal sets for this machine.


Funhouse Pinball Machine (Williams, 1990)

Location: Windsor, Colorado.
Symptom: Dead, with a slight humming sound.

When powered up, a slight humming sound would come from the speakers, indicating that at least part of the machine was getting power. No lights were coming on and the MPU was not booting.

Checking the fuses, I found fuse (F113) bad, which powers the 5V logic circuit.  I replaced the fuse and it blew again within a few seconds.  I unplugged the MPU board and the 5 volt supplies to the playfield.  With my multimeter, I determined a short existed on the power/driver board.  I suspected the bridge rectifier had failed. Checking the rectifier I was able to confirm a shorted diode between one of the AC inputs and the “+” output.

When I removed the old bridge rectifier, it was clear why it failed.  When assembled at the factory, the screw was cross-threaded and the rectifier never made good contact with the heaksink.

Heatsink for bridge rectifiers on the Power/Driver Board.  Left end of heatsink never had a good thermal connection with the rectifier.

Heatsink for bridge rectifiers on the Power/Driver Board. Left end of heatsink never had a good thermal connection with the rectifier.

Lately, I’ve been seeing a number if issues in pinball machines where the problem originated at the factory.  For example, I was recently working on a Bally Scorpion and found a staple in the wire harness on the backbox light board.

Anyway, after replacing the bridge rectifier, the machine powered up fine.


Jurassic Park Pinball Machine (Data East, 1993)

Location: Niwot, Colorado
Symptom: Smoke,  GI lights not working, some switches not working

There were a number of burned connectors in the backbox.  There were a couple associated with the GI lighting on the light board and the play field, and another connector on the power supply board.

I was able to re-pin one of the GI lighting connectors and the owner suggested just bypassing (removing from the circuit) the connector for the light board since it was unlikely that anyone would need to take the light board out of the backbox.

Burned connector, CN1, on the power supply board.

Burned connector, CN1, on the power supply board.

The power supply connector was problematic.  I tried several ways to fix it, but it would just heat up and start smoking again.  Part of the problem was the plastic had melted and mixed with the solder, making it very difficult for the solder to stick to the metal.  I decided that it would be best to replace both the PCB mounted connector and its mate.

Fixing the connectors solved all of the power problems.

There were several switches not working.  One had a broken wire.  Another was mis-wired at a connector, making me wonder if it hadn’t left the factory that way.  After everything was fixed, the owner and his son were trying it out and exclaimed they hadn’t seen various modes of the game previously.  It hadn’t been fully working in the 10 or 15 years they had it.